After all the problems I have experienced with hosting companies, I decided to jump into the world of VPS – virtual private server – to create my own hosting.
Not to sell hosting to others, but to have total control – and cost savings!
Setting up your own hosting can be very rewarding, but I don’t recommend it for everyone. Sometimes it is better to buy a boat, than to try and build your own.
The countless hours I have spent learning – are now a stepping stone for you.
Welcome to our comprehensive guide on setting up a WordPress website with optimal performance and security using a VPS server. This step-by-step tutorial will walk you through the process of configuring Ubuntu, Nginx, MariaDB, and PHP to create a robust foundation for your WordPress site. We’ll also leverage advanced techniques such as Nginx FastCGI cache, Redis object caching, Let’s Encrypt for SSL, and integrate Cloudflare CDN to ensure a fast, secure, and scalable WordPress installation.
Setting Up a WordPress Website on Ubuntu VPS with Nginx, MariaDB, and PHP
Need a Domain Name?
Choosing a domain name can be the hardest part! I can’t help you with that, but I can recommend where to buy one – NameCheap – I have more than a dozen domain names registered through them. They have free domain privacy and a good DNS/Nameserver management area that includes a simple redirect section as well.
Register Your Domains Hassle-Free with Namecheap starting at $3.98/year
Table of Contents
Create a New Project
Login to Digital Ocean and create your first Project.
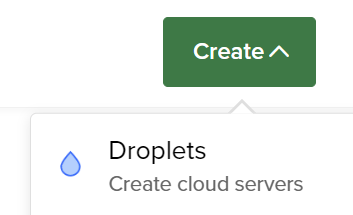
Create a Droplet (a virtual machine)
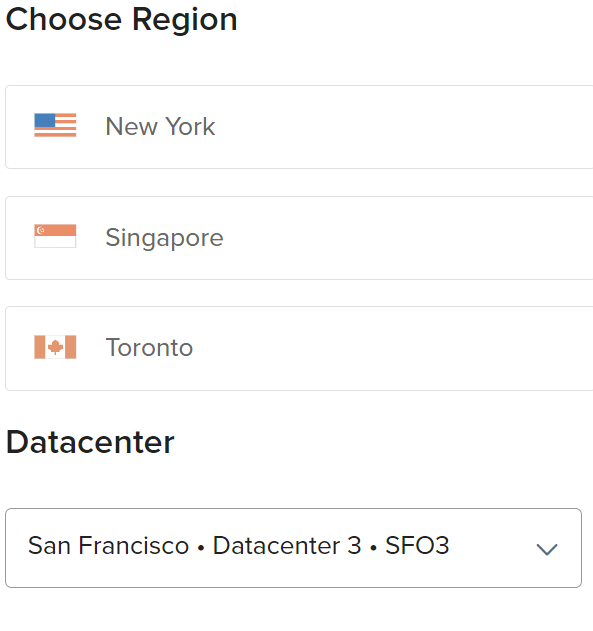
Choose Your Region
(Note: Some datacenters may have different price options available)
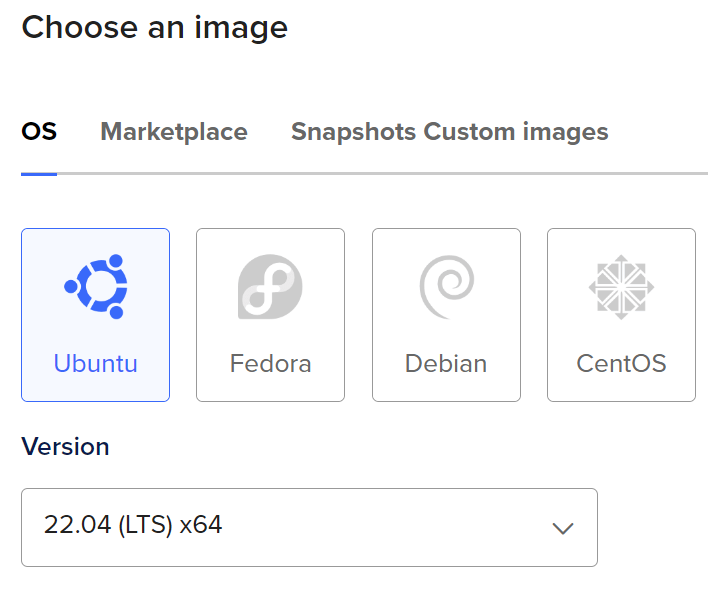
The Operating System
We will be using Ubuntu Version 22.04 LTS (Long Term Support). Your VPS will be created with the operating system ready to go.
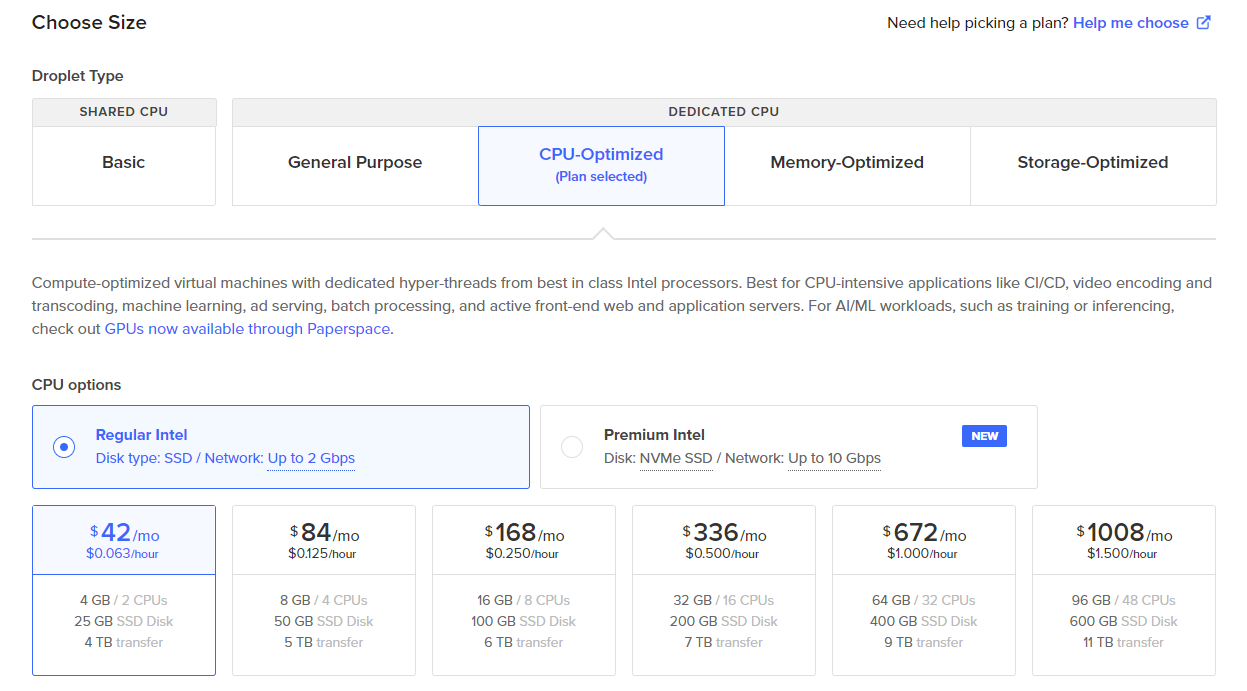
Choose a D.O. Plan
If you are serious about having a fast WordPress website, you can start with the cheapest Dedicated CPU-Optimized plan for $42/month (billed at $0.063/hour). Otherwise, start with a shared CPU plan and upgrade later .
You can upgrade/downgrade anytime – just be mindful that the SSD size is what limits your freedom to change plans.
**Tips**
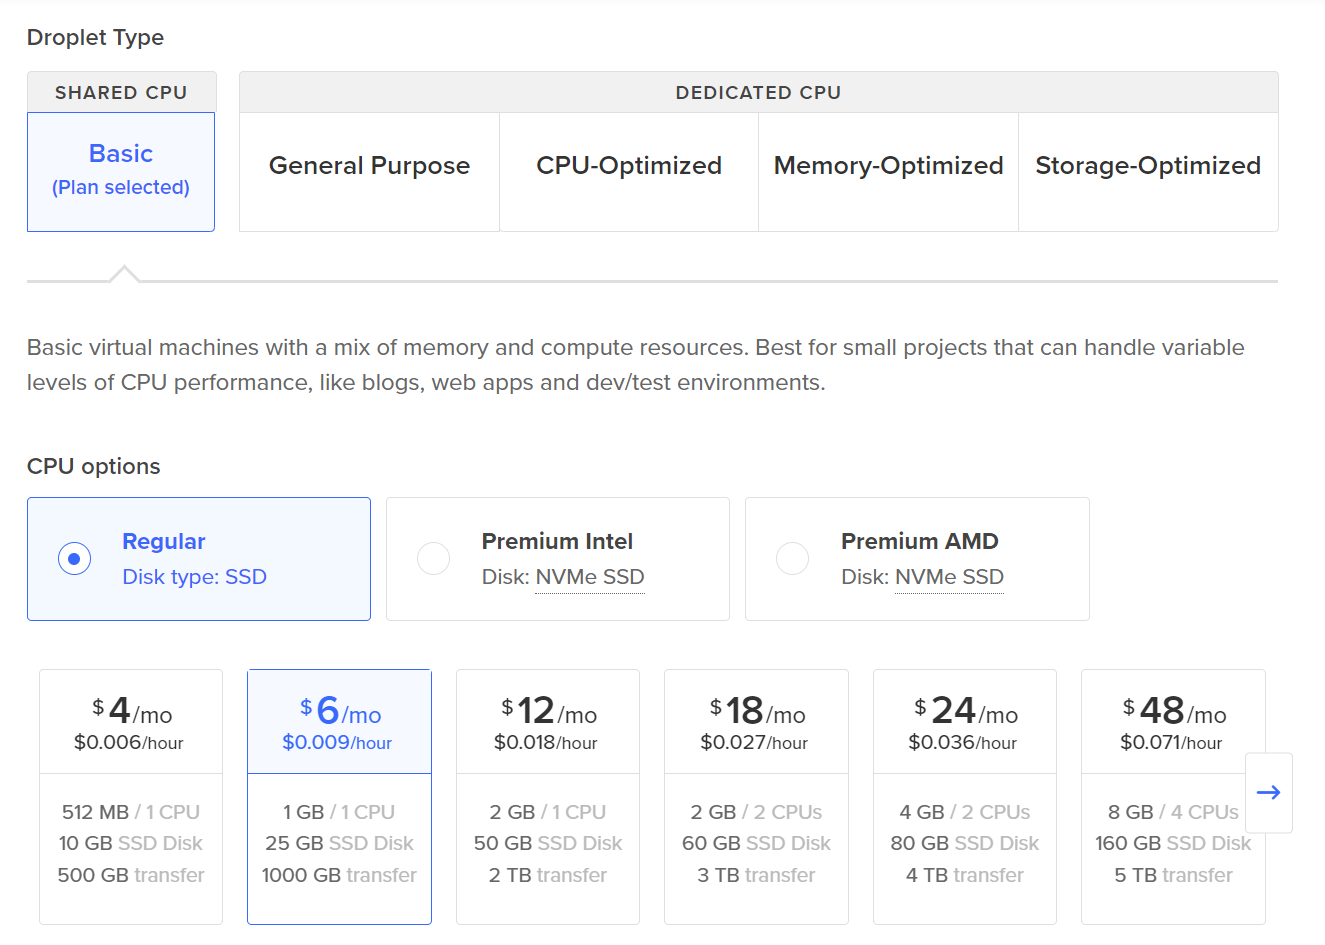
Don’t get a basic shared CPU plan with a larger SSD than you need. It will be more difficult or expensive to upgrade later.
Start with at least 1 GB of RAM. Remember you can easily create and destroy Droplets.
Recommended Plan
Budget, Just Getting Started Plan
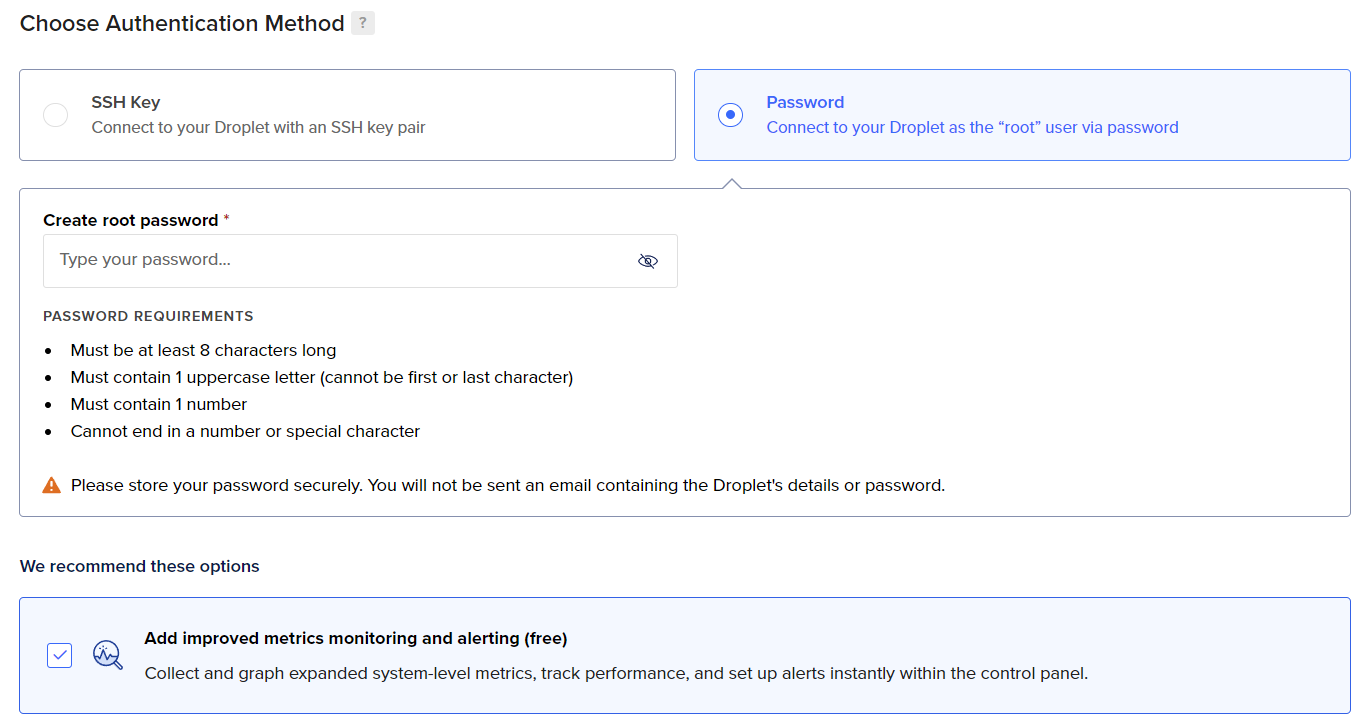
Setup A Strong Password
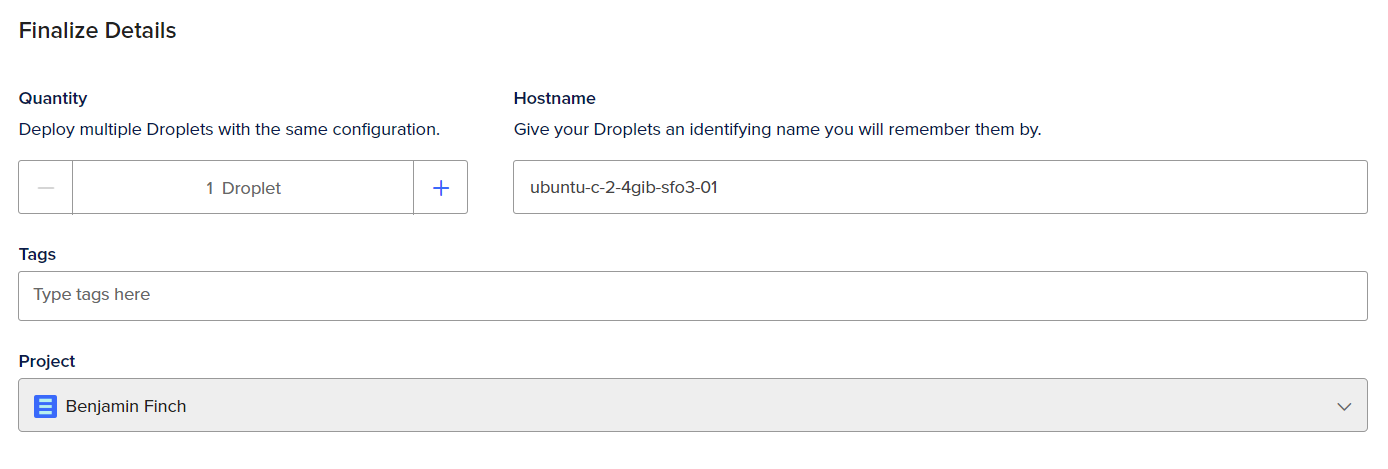
Final Details
Name your droplet whatever you want to help you identify your virtual machine. Add it to your project you created. Click Create!

CONGRATULATIONS!
Step 2: Setup A Web Server (on your new machine!)
Let’s get right into playing with your new virtual machine. We will need to connect to it first.
Download PUTTY
You will need a program called PUTTY to remotely connect to your virtual machine in the cloud. It’s easy to setup. Click the button to open putty.org in a new window.
Find Your IP Address
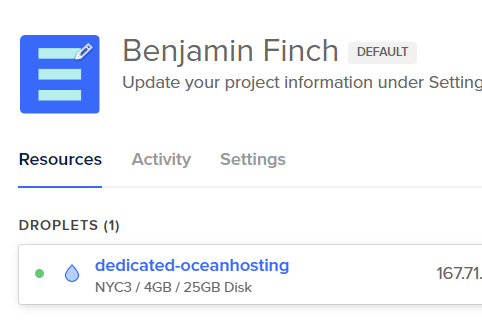
Your IP Address for your droplet will be shown in your project area. Copy and paste it into PUTTY. Always keep your IP address secret.
At the end of this tutorial we will setup a proxy to hide the IP address from hackers.
**CHANGE DNS SETTINGS***
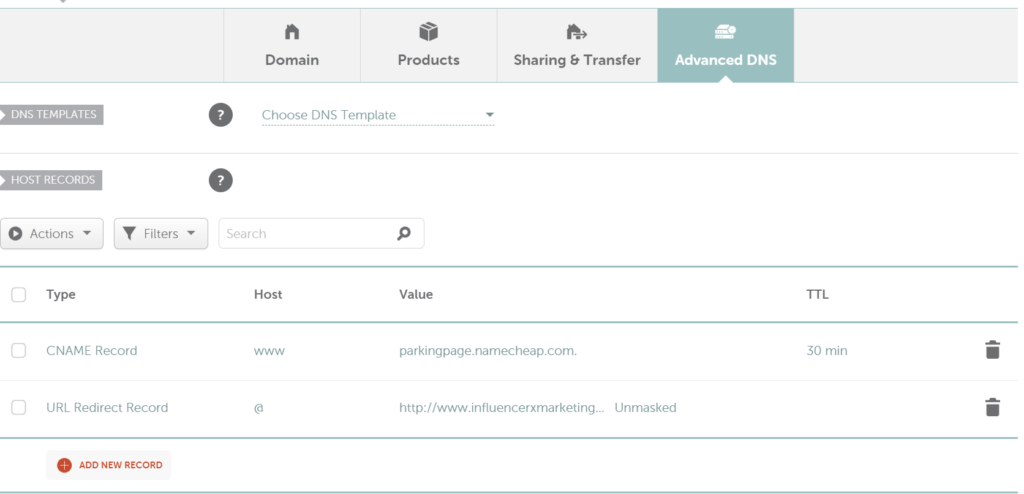
You will want to point your domain name to this IP Address.
If you have your domain name registered with NameCheap – click MANAGE next to your domain name – then select the tab for Advanced DNS. It may take some time for the new records to propagate around the web.
(Stupid disclaimer: replace the values above with your actual ip address of your droplet and your domain name)
If you are using a different domain registrar – find the area for managing DNS (search the web for help if you can’t find it).
SSH (Your Command Center)
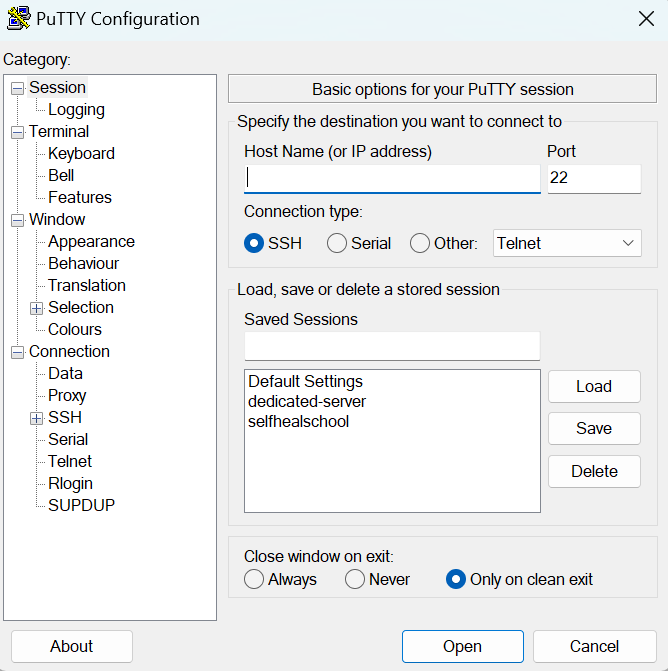
Open PUTTY and put in the IP Address for your virtual machine.
The default port is 22 since we haven’t changed it yet.
Press Open to connect.
Use the password you entered when creating the droplet.
[Note: you are connecting as the root user]
*You can put a name into Saved Sessions and click ‘Save’ for easy loading next time.
The Terminal Window
This is where the magic happens. You have a clean Linux based operating system. No fancy user interfaces. Just the command line.
You are going to install all the webserver software. It’s literally copy and paste.
But first, it is recommended to create a new user (so you aren’t logging in as root user).
Create User
Copy and paste the code into the PUTTY window. *Right Click to paste into PUTTY.
You will be prompted for a password. Create a strong password. The other details are not required. Press ENTER to skip any other info you don’t need.
CREATE NEW USER
Bash
adduser sammyGive User Admin Privileges
GIVE USER POWER
Bash
usermod -aG sudo sammyConnect As New User
Open PUTTY – instead of logging in as root change. Change the IP address field to [email protected]
Use the password created for the new user.
Set Up a Firewall
UFW stands for Uncomplicated Firewall. We will use it to allow or disallow certain types of connections. Not complicated.
sudo ufw allow OpenSSHsudo ufw enablesudo ufw statusInstall Nginx, MariaDB, PHP (LEMP)
Commonly referred to as a LEMP stack – as in Linux, Nginx (Engine x), MariaDB & PHP
NGINX
sudo apt updatesudo apt install nginxPRESS Y AND ENTER
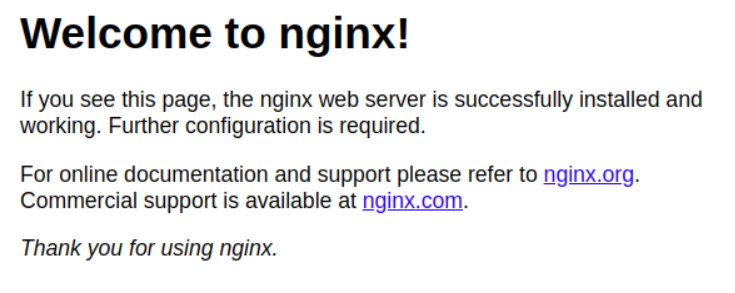
sudo ufw allow 'Nginx HTTP'sudo ufw statusNGINX is installed. You can now check it at http://your.ip.address in your browser.
MariaDB (Database)
sudo apt install mariadb-serversudo mysql_secure_installationThis will being the prompts to secure our MariaDB installation.
sudo mariadbGRANT ALL ON *.* TO 'admin'@'localhost' IDENTIFIED BY 'password' WITH GRANT OPTION;FLUSH PRIVILEGES;exitTesting MariaDB
sudo systemctl status mariadbIf MariaDB isn’t running, start it with the following command
sudo systemctl start mariadbMariaDB is ready to go.
Install PHP
sudo apt install php8.1-fpm php-mysql php-curl php-gd php-intl php-mbstring php-soap php-xml php-xmlrpc php-zipConfigure NGINX to Use PHP
sudo mkdir /var/www/your_domainsudo chown -R $USER:$USER /var/www/your_domainsudo nano /etc/nginx/sites-available/your_domainserver {
listen 80;
server_name your_domain www.your_domain;
root /var/www/your_domain;
index index.html index.htm index.php;
location / {
try_files $uri $uri/ /index.php$is_args$args;
}
location ~ .php$ {
include snippets/fastcgi-php.conf;
fastcgi_pass unix:/var/run/php/php8.1-fpm.sock;
}
location ~ /.ht {
deny all;
}
location = /favicon.ico { log_not_found off; access_log off; }
location = /robots.txt { log_not_found off; access_log off; allow all; }
location ~* .(css|gif|ico|jpeg|jpg|js|png)$ {
expires max;
log_not_found off;
}
}Close and save the file: CTRL X -> Y -> ENTER
sudo ln -s /etc/nginx/sites-available/your_domain /etc/nginx/sites-enabled/sudo unlink /etc/nginx/sites-enabled/defaultsudo nginx -tsudo systemctl reload nginxCreate a Database
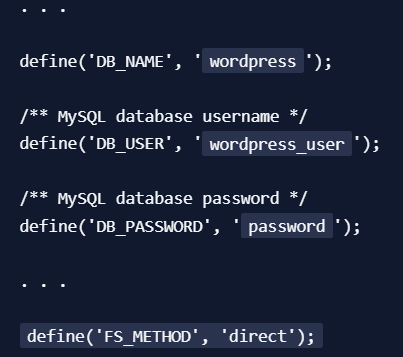
sudo mariadbCREATE DATABASE wordpress DEFAULT CHARACTER SET utf8 COLLATE utf8_unicode_ci;GRANT ALL ON wordpress.* TO 'wordpress_user'@'localhost' IDENTIFIED BY 'password';FLUSH PRIVILEGES;EXIT;Download/Install WordPress
cd /tmpcurl -LO https://wordpress.org/latest.tar.gztar xzvf latest.tar.gzcp /tmp/wordpress/wp-config-sample.php /tmp/wordpress/wp-config.phpsudo cp -a /tmp/wordpress/. /var/www/your_domainsudo chown -R www-data:www-data /var/www/your_domaincurl -s https://api.wordpress.org/secret-key/1.1/salt/nano /var/www/your_domain/wp-config.phpCopy and paste your unique salts in the wp-config.php here…
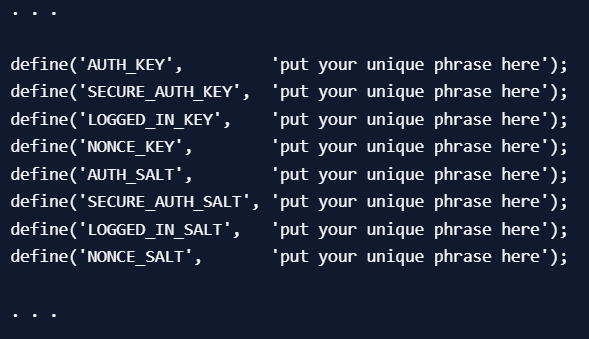
Add the MariaDB database name, user and password
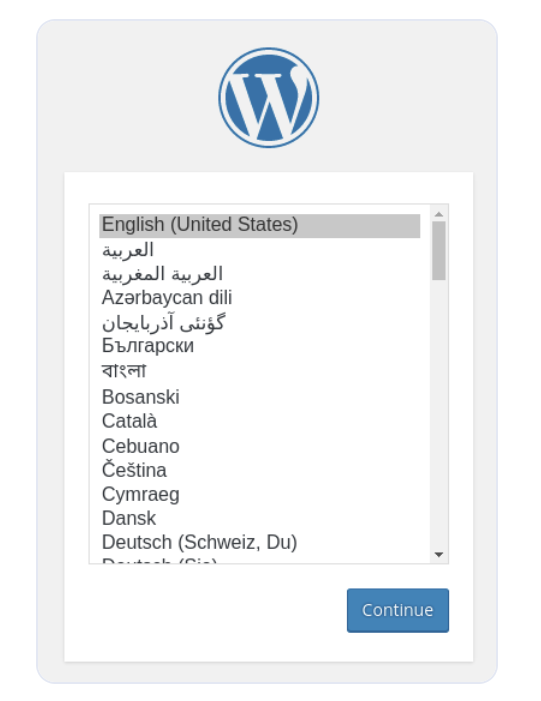
Finish Setting Up WordPress
Go to http://your_domain.com
Follow the prompts.
Let’s Encrypt SSL Certificate
..back in the PUTTY terminal
sudo snap install core; sudo snap refresh coresudo snap install --classic certbotsudo ln -s /snap/bin/certbot /usr/bin/certbot
updating firewall settings to allow HTTPS
sudo ufw allow 'Nginx Full'
removing HTTP access
sudo ufw delete allow 'Nginx HTTP'
get certificates
sudo certbot --nginx -d example.com -d www.example.com
check to see if it will autor renew
sudo certbot renew --dry-runUpdate WordPress Address
Login to your WordPress Dashboard and go to ‘Settings” to update the http: to https:

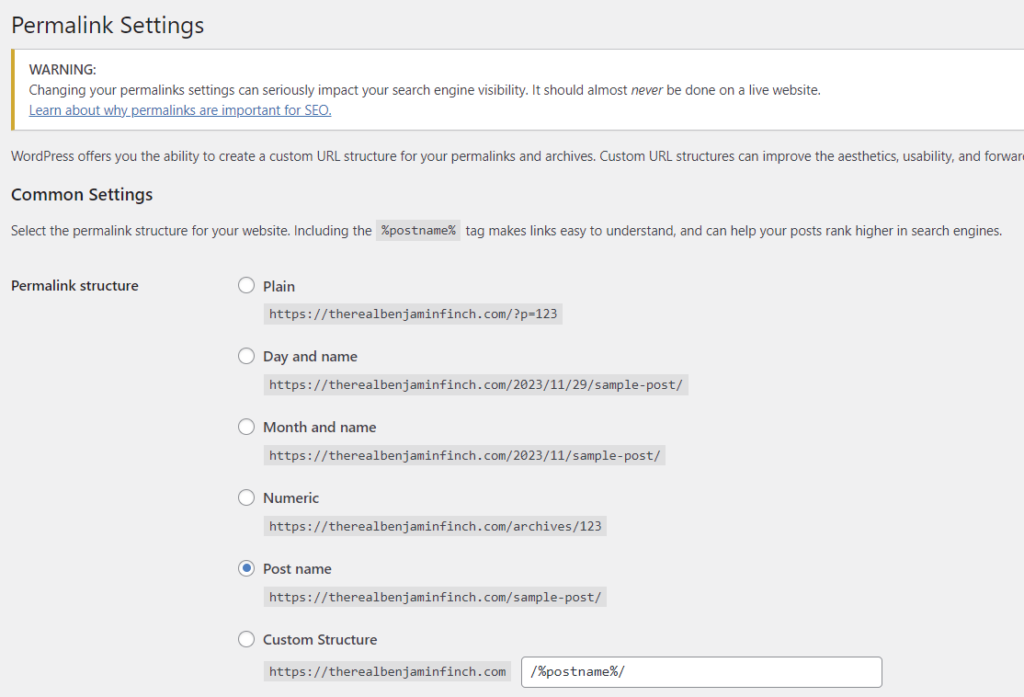
WordPress Permalinks
Under Settings in the WordPress menu is a section called Permalinks. Update this option now. I have chosen Post name structure.
Nginx FastCGI Cache
Out of the box installations of WordPress on Nginx is going to have poor performance. Let’s make it fast.
Understanding FastCGI Cache
FastCGI cache is a mechanism that allows Nginx to cache dynamic content generated by PHP, reducing the server load and significantly improving response times. This is especially useful for WordPress sites with dynamic content.
Add FastCGI Cache Configuration
/etc/nginx/sites-available/your_domain
cd /etc/nginx/sites-available/sudo nano yourdomain.comThis is what my nginx config file looks like after adding fastcgi caching…
Note: Don’t include .com where you replace YOUR_DOMAIN unless it is already included.
#add this line to top of your Nginx config
#it will create a folder to store cache files and name a zone
fastcgi_cache_path /var/run/YOUR_DOMAIN-fastcgi-cache levels=1:2 keys_zone=YOUR_DOMAIN:200m max_size=10g inactive=24h use_temp_path=off;
server {
        server_name YOUR_DOMAIN.com www.YOUR_DOMAIN.com;
        root /var/www/YOUR_DOMAIN.com;
        index index.php index.html index.htm index.nginx-debian.html;
        #------ADD CACHE RULES
        set $skip_cache 0;
        #exclude homepage
        #if ($request_uri ~ ^/$) {
         #       set $skip_cache 1;
        #}
        # woocommerce
        #if ($request_uri ~* "/cart.*|/my-account.*|/checkout.*|/addons.*") {
        #        set $skip_cache 1;
        #}
        if ($request_method = POST) {
            set $skip_cache 1;
        }
        if ($query_string != "") {
            set $skip_cache 1;
        }
        if ($request_uri ~* "/login*|/wp-admin/|/xmlrpc.php|wp-.*.php|^/feed/*|/tag/.*/feed/*|index.php|/.*sitemap.*.(xml|xsl)") {
            set $skip_cache 1;
        }
        if ($http_cookie ~* "comment_author|wordpress_[a-f0-9]+|wp-postpass|wordpress_no_cache|wordpress_logged_in") {
            set $skip_cache 1;
        }
        location / {
            #try_files $uri $uri/ =404;
            try_files $uri $uri/ /index.php$is_args$args;
        }
        location ~ .php$ {
            fastcgi_pass unix:/var/run/php/php8.1-fpm.sock;
            include snippets/fastcgi-php.conf;
            fastcgi_cache YOUR_DOMAIN;
            fastcgi_cache_valid 200 301 302 45h;
            fastcgi_cache_use_stale error timeout updating invalid_header http_500 http_503;
            fastcgi_cache_min_uses 1;
            fastcgi_cache_lock on;
            fastcgi_cache_bypass $skip_cache;
            fastcgi_no_cache $skip_cache;
            add_header X-FastCGI-Cache $upstream_cache_status;
        }
        location ~* ^/wp-content/uploads/.*.(html|htm|shtml|php|js|swf)$ {
                deny all;
                access_log off;
                log_not_found off;
        }
        location ~ /.ht {
                deny all;
                access_log off;
                log_not_found off;
        }
        location = /xmlrpc.php {
                deny all;
                access_log off;
                log_not_found off;
        }
        location = /docker.yaml {
                deny all;
                access_log off;
                log_not_found off;
        }
        location ~* /wp-includes/.*.php$ {
                deny all;
                access_log off;
                log_not_found off;
        }
        location ~* /wp-content/.*.php$ {
                deny all;
                access_log off;
                log_not_found off;
        }
        location ~* /wp-content/uploads/.*.php$ {
                deny all;
                access_log off;
                log_not_found off;
        }
        location ~* wp-config.php {
                deny all;
                access_log off;
                log_not_found off;
        }
        location = /favicon.ico { log_not_found off; access_log off; }
        location = /robots.txt { log_not_found off; access_log off; allow all; }
        location ~* .(css|gif|ico|jpeg|jpg|js|png)$ {
        expires max;
        log_not_found off;
        }
        client_max_body_size 200M;
....#If you an installed ssl certificate your ssl will be here before the close of this server block.
	listen 443 ssl; # managed by Certbot
...
}
/etc/nginx/nginx.conf
Bash
sudo nano /etc/nginx/nginx.confAdd the fastcgi lines below into the nginx.conf file at the top of the http block
http {
        fastcgi_cache_key "$scheme$request_method$host$request_uri";
        fastcgi_ignore_headers Cache-Control Expires Set-Cookie;
        #custom setting
        fastcgi_read_timeout 120;
Test the Nginx configuration for errors.
sudo nginx -tRestart Nginx to adopt changes.
sudo systemctl restart nginxNginx Helper Plugin
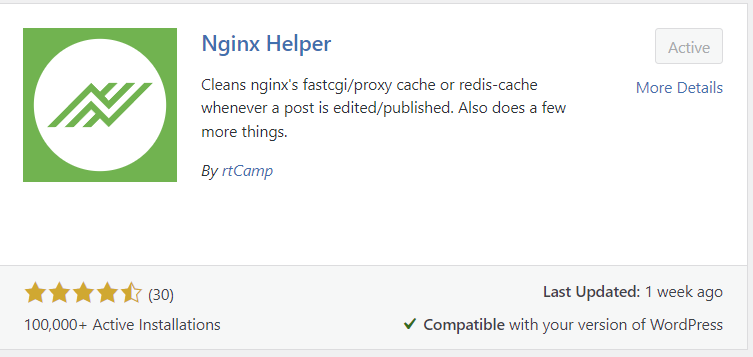
In WordPress, go to Plugins -> Add New
Search for Nginx Helper. Install & Activate
Configure Nginx Helper
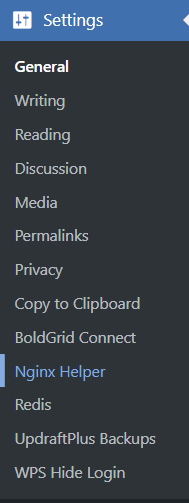
In the WordPress dashboard, Nginx Helper is located under Settings.
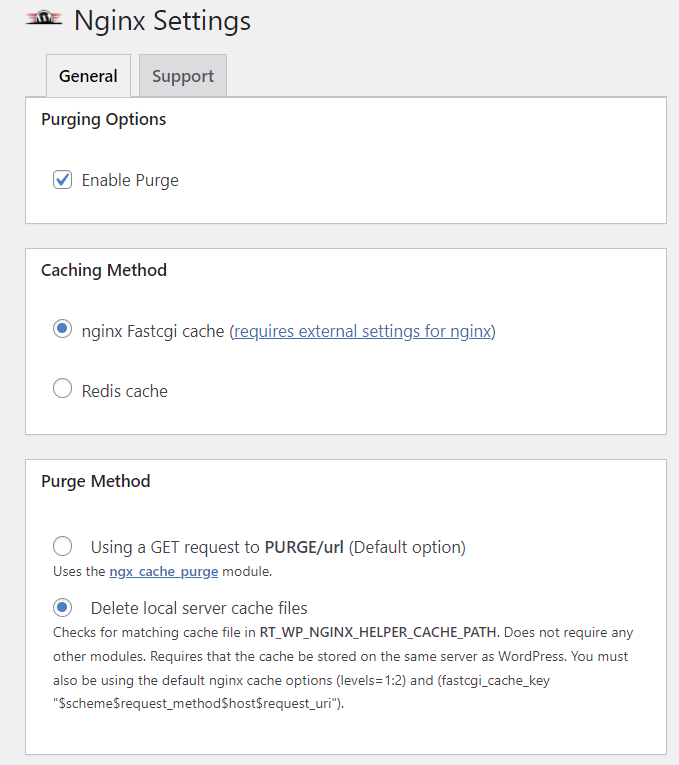
Check out the settings below. There’s a few more settings to automatically purge content when things are updated. Adjust them to your needs.
Nginx FastCGI – wp-config.php
There is only one more change to complete the fastcgi caching setup for WordPress
Bash
sudo nano /var/www/your_domain/wp-config.phpCopy and paste these lines at the top of the wp-config.php file. Just below the <?php tag
The path needs to match the path that you set in the first line of the nginx config file at /etc/nginx/sites-available/your_domain
define( 'RT_WP_NGINX_HELPER_CACHE_PATH', '/run/YOUR_DOMAIN-fastcgi-cache' );
define( 'WP_CACHE', true );
Redis Object Caching
Redis object caching is a technique used to improve the performance of dynamic websites, particularly those built on content management systems (CMS) like WordPress. It involves using Redis, an advanced key-value store, as a caching mechanism to store and retrieve frequently accessed or computationally expensive data.
Installing and Configuring Redis
sudo apt updatesudo apt install redis-serversudo systemctl start redis-serverThe command below will tell redis to start automatically if the server is reset.
sudo systemctl enable redis-serversudo systemctl status redis-serverConfigure WordPress for Redis Caching
Install Redis PHP Extension
sudo apt install php-redissudo apt install php-redisEdit wp-config.php
sudo nano /var/www/yourdomain.com/wp-config.phpdefine('WP_REDIS_HOST', '127.0.0.1');
define('WP_REDIS_PORT', '6379');
define('WP_REDIS_DATABASE', '0');Install “Redis Object Cache” plugin
Add Plugin – Redis Object Cache from the WordPress Plugin section – Install & Activate
Go to WP Dashboard -> Settings -> Redis
Enable Object Cache
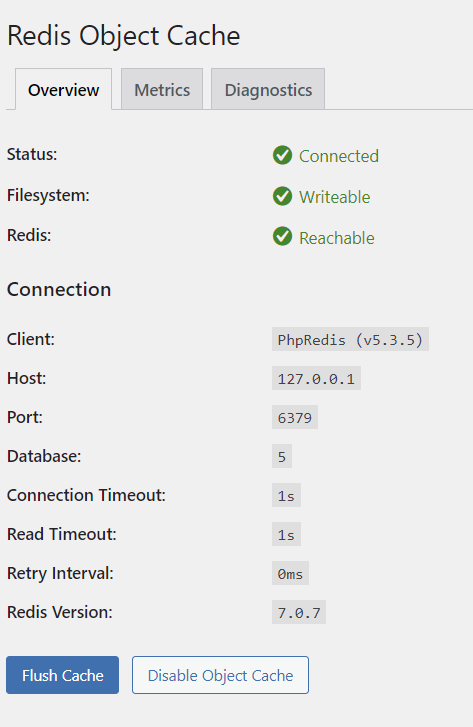
redis-cli pingIt should reply with PONG
Cloudflare CDN
Sign up for the free plan from Cloudflare!
A CDN can help serve some static files like images from multiple servers around the world. This can increase the speed for some users. However, it is even more important for an extra security layer.
By changing nameservers to move DNS records to Cloudflare we can proxy the IP address of our server. Hiding your virtual machine’s IP is a great way to prevent direct attacks on your system.
Add Site to Cloudflare
After creating an account, login and click the Add Site button on your Cloudflare dashboard.
This will guide you through the setup where you will be requested to change the nameservers.
Update Nameservers
If you registered your domain name with Namecheap.com, you can follow along here for an example. Go to your domain list and click Manage. Then, select Custom DNS from the NAMESERVERS.
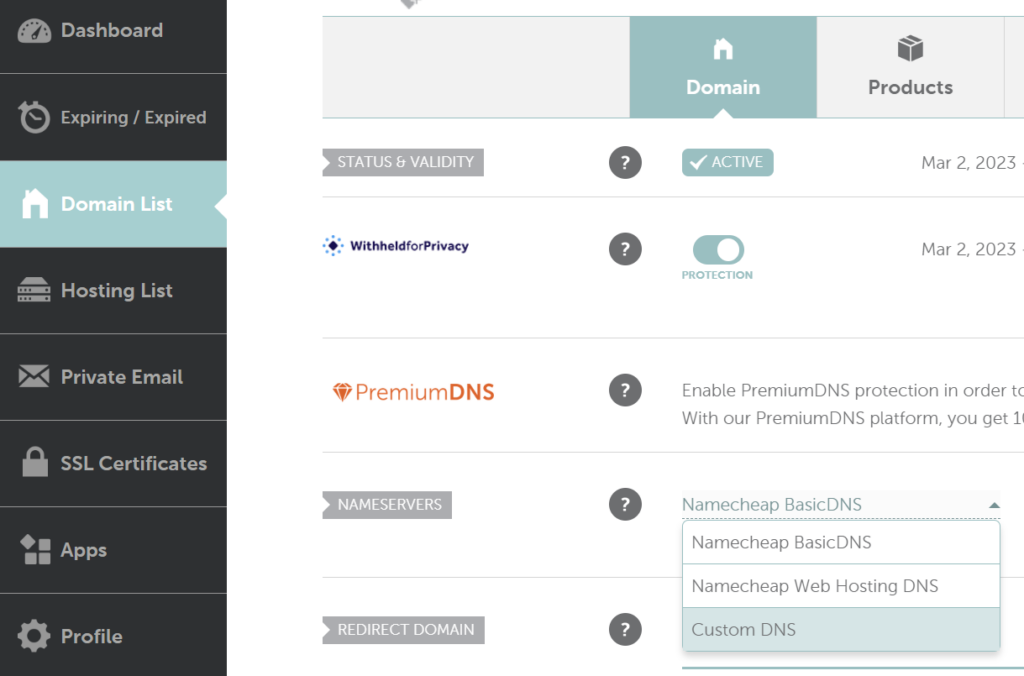
Cloudflare will provide you with the names that you need to put here. Hit the green check mark when you have entered the new nameserver details..

Cloudflare DNS
Cloudflare should be able to import your DNS records so just check that they are correct. They will already be set to ‘proxy’ for your protection.
Now, wait until the nameservers have some time to propagate. It shouldn’t take long before Cloudflare is working for your site.
Cloudflare SSL/TLS
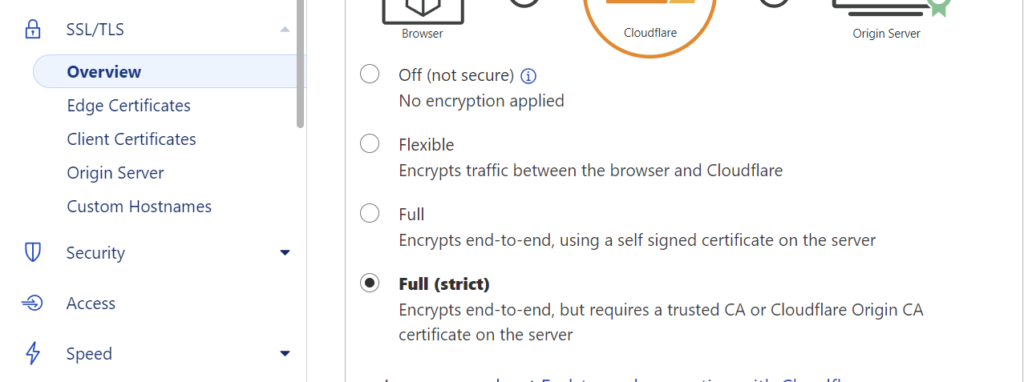
If you already followed the previous steps to install a security certificate for https:// encryption…
Then, go to SSL/TLS settings and select Full (strict)
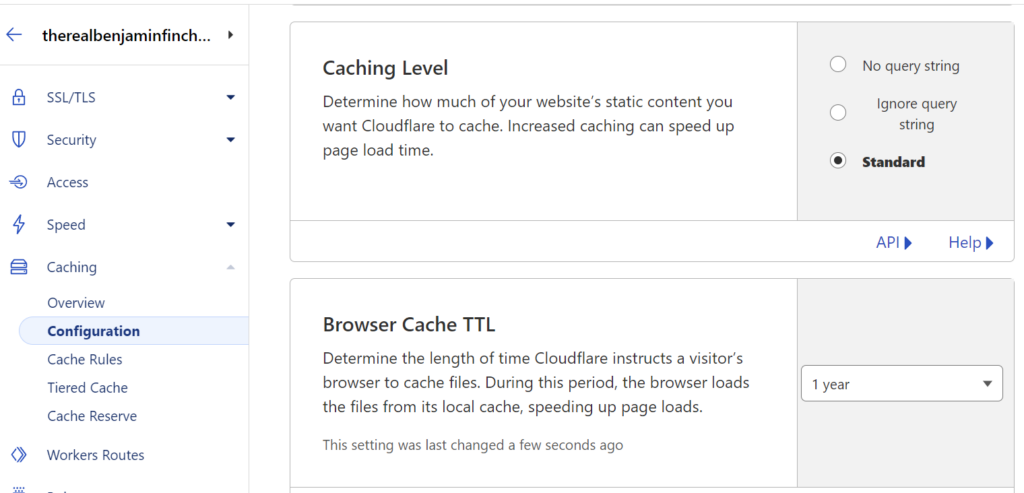
Cloudflare Cache Configuration
Browser Cache settings can have a big improvement on your site’s performance by allowing your visitors to store static files such as images on their computers.
Step 1: Acquire a VPS
While you can setup a computer as a webserver, I chose to rent a VPS (Virtual Private Server) for high reliability, better security, and convenience. You can rent them by the minute! I use Digital Ocean and recommend you do too. If you want to say thanks for the info – the best way is to use my referral link. I only recommend them, because I use their service for this website and many more.
Create an account at Digital Ocean
I recommend Digital Ocean because it is the company I use to create my web servers. It works. Try them for yourself. Everyone I refer gets $200 in credit to use within 60 days. Most people won’t need that much, so it’s basically 2 free months! Use my referral button below and get started now:
